Thunderbird Email Setup
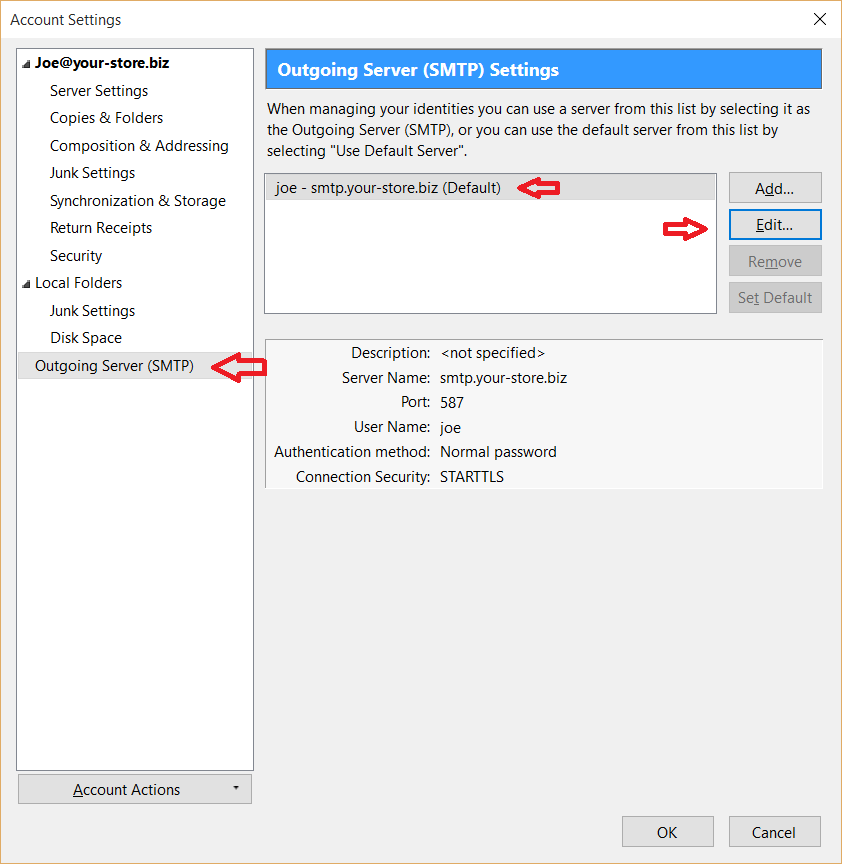
Recommended mail server settings (easiest setup)
- Incoming mail server (IMAP):
mail.yourdomain.com— port 993 (SSL) or 143 (STARTTLS) - Outgoing mail server (SMTP):
smtp.yourdomain.com— port 587 (STARTTLS) - Username: your full email address · Password: your email password
Replace yourdomain.com with your actual domain name. Using mail. and smtp. works for every account and is the easiest way to set up. IMAP is recommended so your email stays in sync across all your devices. (POP incoming uses mail.yourdomain.com on port 995/SSL.)
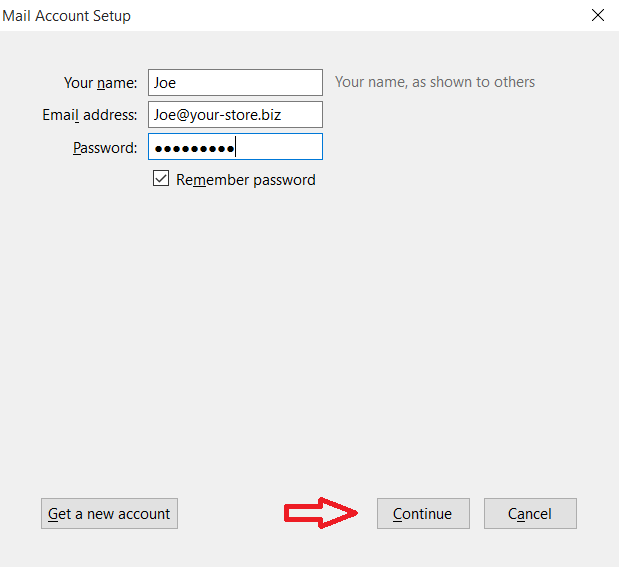
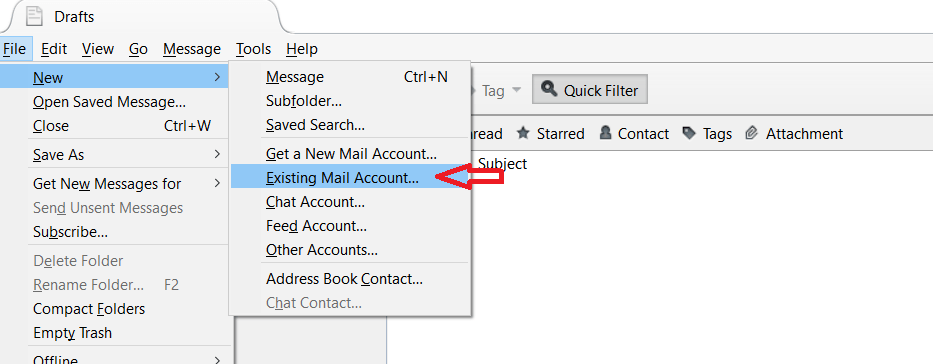 On the next screen, fill in your name, email address, and password; then click the Continue button.
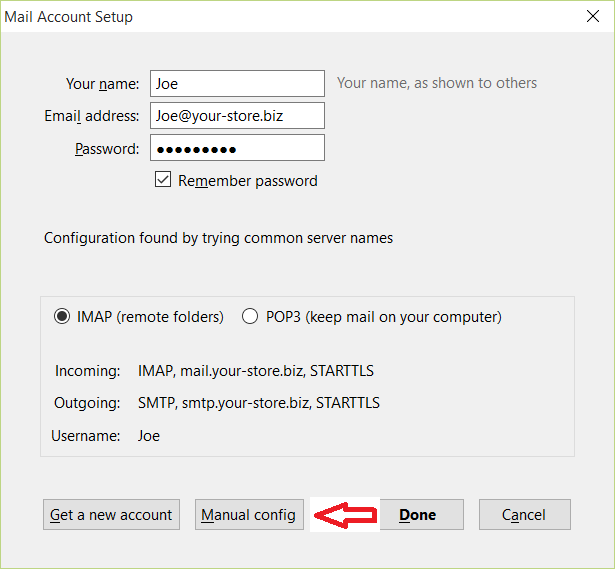
 2. After you click to continue, Thunderbird will try to auto-detect your email settings, but it generally does not succeed. Click the Manual Config button
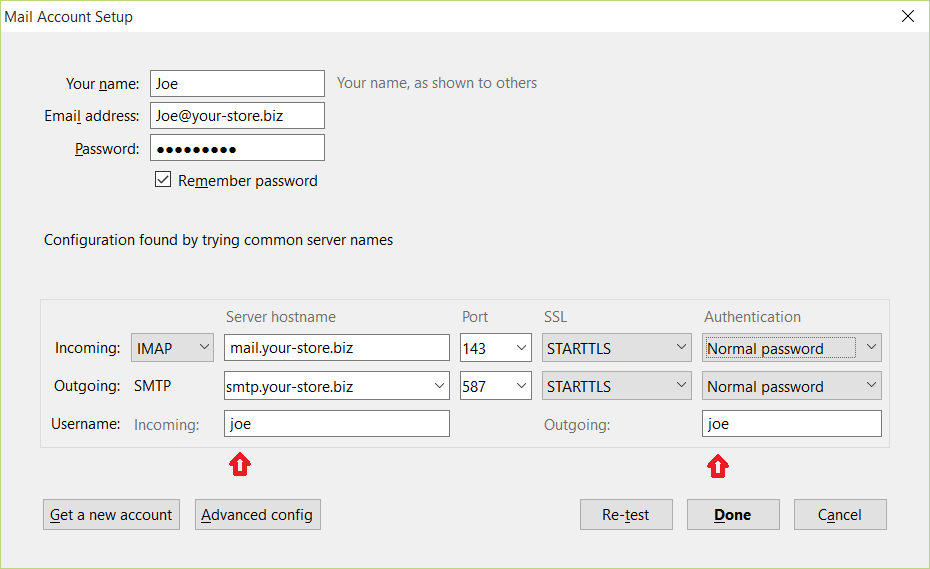
 3. After clicking on “Manual Config”, you will see the screen below.
a. Fill in your name, and your email address as you would like your customers to see it.
b. Leave the incoming selection as IMAP
c. Type in or leave the incoming and outgoing mail server as mail.[your actual domain]. So, following our example, set the mail servers to mail.your-store.biz The smtp.[your actual domain] would also work for the outgoing.
Optionally, you can also use the server name in the incoming and outgoing mail sever fields; you may alternatively use your server name (it matches the SSL/TLS certificate), so you will not get a security warning that the “Certificates do not match…” To see the server name of the server hosting your site, type in, for example,www.your-store.biz/admin (using your actual domain name) and see what it redirects to. Our example domain redirects to https://server105.secure-access.net:81/login.php The bold section of the url server105.secure-access.net is what you would use as the server name.
d. Set the username to all lower case ‘joe” not “joe@your-store.biz”.
e. The password should already be showing, it is the password that you used for this account when you created it in your /siteadmin
f. The other incoming settings should be: port 143 (for IMAP), SSL set to STARTTLS, and Authentication to "Normal Password".
g. The other outgoing settings should be: port 587 (not 25), SSL set to STARTTLS, and Authentication to "Normal Password".
h. Click “Re-Test” button. If you see no errors click the Done button.
3. After clicking on “Manual Config”, you will see the screen below.
a. Fill in your name, and your email address as you would like your customers to see it.
b. Leave the incoming selection as IMAP
c. Type in or leave the incoming and outgoing mail server as mail.[your actual domain]. So, following our example, set the mail servers to mail.your-store.biz The smtp.[your actual domain] would also work for the outgoing.
Optionally, you can also use the server name in the incoming and outgoing mail sever fields; you may alternatively use your server name (it matches the SSL/TLS certificate), so you will not get a security warning that the “Certificates do not match…” To see the server name of the server hosting your site, type in, for example,www.your-store.biz/admin (using your actual domain name) and see what it redirects to. Our example domain redirects to https://server105.secure-access.net:81/login.php The bold section of the url server105.secure-access.net is what you would use as the server name.
d. Set the username to all lower case ‘joe” not “joe@your-store.biz”.
e. The password should already be showing, it is the password that you used for this account when you created it in your /siteadmin
f. The other incoming settings should be: port 143 (for IMAP), SSL set to STARTTLS, and Authentication to "Normal Password".
g. The other outgoing settings should be: port 587 (not 25), SSL set to STARTTLS, and Authentication to "Normal Password".
h. Click “Re-Test” button. If you see no errors click the Done button.
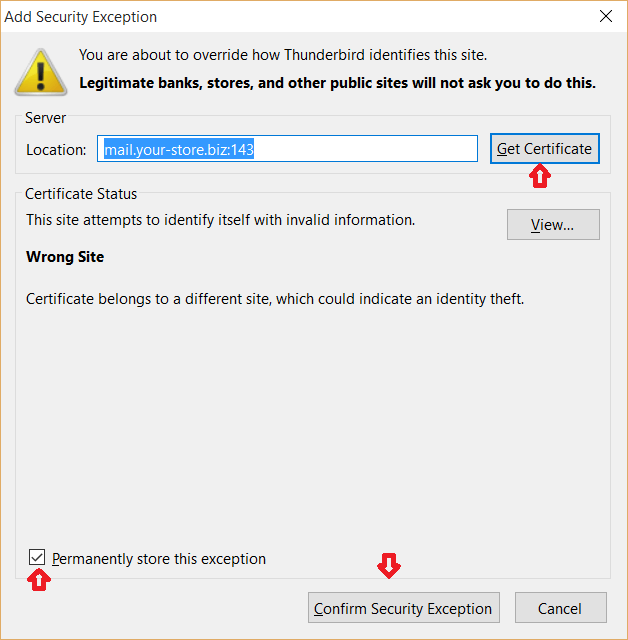
 4. The next screen will prompt you to confirm a security exception. This will display if you used mail.[your actual domain] as your incoming and or outgoing mail server (as opposed to using the actual server name). You should "Get Certificate", "Permanently Store" it, and click the Confirm button.
 5. When you first send an email, Thunderbird will also prompt you to confirm the security certificate for the outgoing mail server. You will also want to Get Certificate, Permanently Store, and Confirm this certificate.
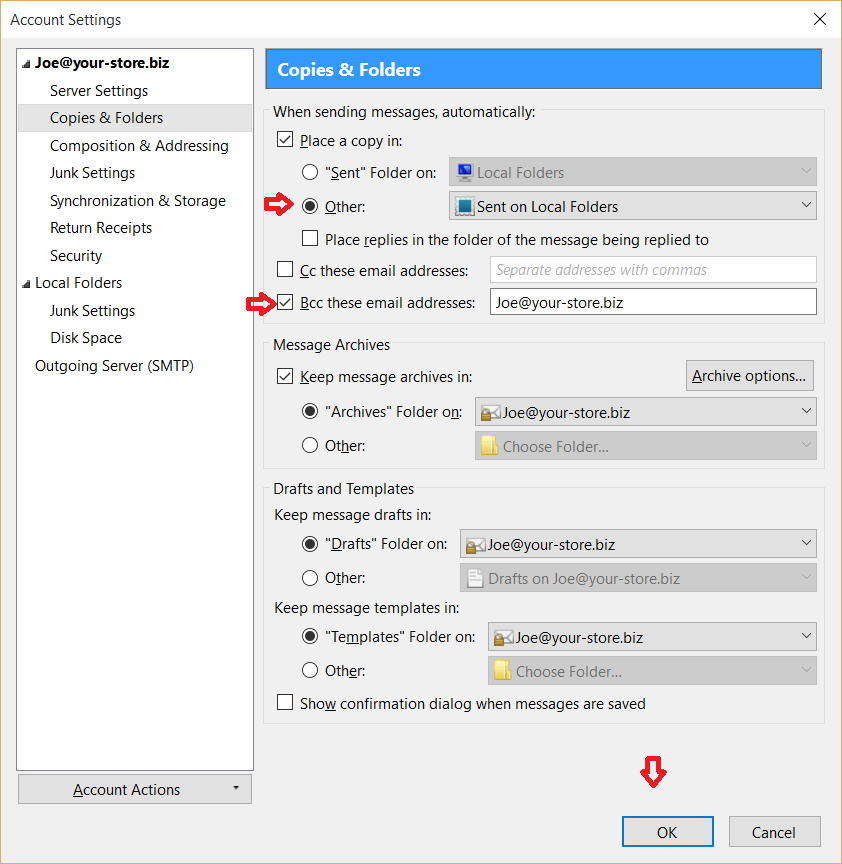
6. Thunderbird tends to fail when copying messages to the Sent Folder if they have any attachments. It will send the email, but you will not see a copy in the Sent folder. To fix this problem in the account list at the left, select the account you just created, then right click and select "Settings". On the Account Settings screen, select "Copied & Folders". On that screen, under "When Sending Messages, automatically", change the selection from "Sent Folder on ..." to "Sent on Local Folders". Then also select to BCC sent emails to yourself.
5. When you first send an email, Thunderbird will also prompt you to confirm the security certificate for the outgoing mail server. You will also want to Get Certificate, Permanently Store, and Confirm this certificate.
6. Thunderbird tends to fail when copying messages to the Sent Folder if they have any attachments. It will send the email, but you will not see a copy in the Sent folder. To fix this problem in the account list at the left, select the account you just created, then right click and select "Settings". On the Account Settings screen, select "Copied & Folders". On that screen, under "When Sending Messages, automatically", change the selection from "Sent Folder on ..." to "Sent on Local Folders". Then also select to BCC sent emails to yourself.