
Mac / iPhone / iPad Email Setup (IMAP)
One‑tap setup for Mac & iPhone.
Tap Set up automatically below and your device downloads a small Apple configuration profile that fills in all your mail settings for you. Here’s what happens next:
On iPhone / iPad
- Tap Set up automatically. Safari shows “Profile Downloaded.”
- Open the Settings app and tap Profile Downloaded near the top (or General › VPN & Device Management).
- Tap the Precision Web Hosting profile, tap Install, and enter your passcode.
- When asked, enter your email password. Your account is ready in the Mail app.
On Mac
- Click Set up automatically. The file saves to your Downloads folder.
- Double‑click the downloaded file, or open System Settings › General › Device Management.
- Click Install and enter your Mac login password.
- When asked, enter your email password. Your account appears in the Mail app.
Or
Manual setup method
Tip: click any value below to copy it.
- Incoming mail server (IMAP):
mail.yourdomain.com— port993(SSL) or143(STARTTLS) - Outgoing mail server (SMTP):
smtp.yourdomain.com— port587(STARTTLS) - Username: your full email address (e.g.
you@yourdomain.com) · Password: your email password
IMAP is recommended so your email stays in sync across all your devices.
(If you select to use POP instead, the POP incoming uses mail.yourdomain.com on port 995/SSL.)
Manual setup — step by step (Mac, iPhone & iPad)
Prefer to enter the settings by hand? Follow these steps on your iPhone or iPad. Wherever you see your-actual-domain.com, use your real domain name, and use your full email address and password. The same settings also work in Mail on a Mac and in most other mail apps.
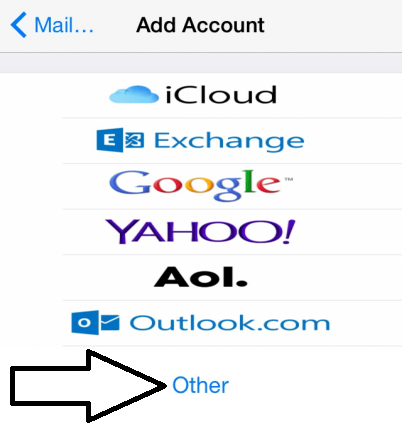
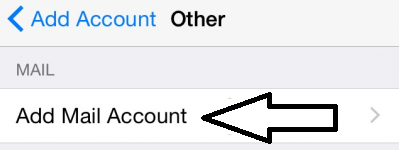
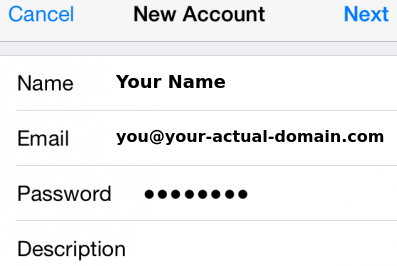
- Name: your name
- Email: your full email address (for example
you@your-actual-domain.com) - Password: your email password
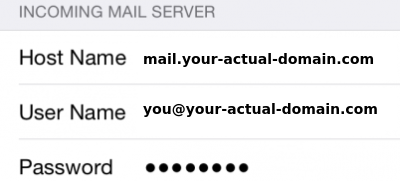
- Host Name:
mail.your-actual-domain.com - User Name: your full email address —
you@your-actual-domain.com - Password: your email password
- Host Name:
smtp.your-actual-domain.com
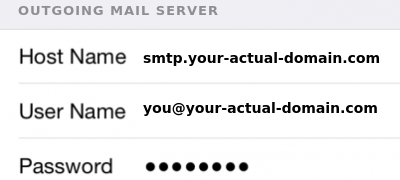
iOS turns on the correct security for you: SSL is on, with IMAP on port 993 and SMTP on port 587. If you are ever asked, keep Use SSL turned on for both incoming and outgoing.
If you prefer POP instead of IMAP? Use mail.your-actual-domain.com as the incoming host and choose POP (incoming port 995/SSL). IMAP is recommended for most people.